
Navigating cake cutting can seem daunting, but mastering a 9-inch round cake is achievable with the right techniques and a helpful guide.
Understanding cake serving sizes and utilizing a chart ensures everyone enjoys a perfect slice, whether it’s a small gathering or a large party.
Why Proper Cutting Matters
Ensuring each slice is consistently sized demonstrates respect for your guests and avoids awkward portion disparities. A well-cut cake enhances the overall presentation, elevating the dessert experience and making it visually appealing.
Proper technique minimizes crumbling, preserving the cake’s structural integrity and preventing a messy serving situation. Utilizing a cake serving chart helps determine appropriate slice sizes, maximizing enjoyment for all attendees, regardless of the occasion.
Tools You’ll Need
Essential for clean cuts is a long, serrated knife – its teeth navigate frosting and crumb with ease. A turntable simplifies rotation, allowing for precise slicing without disturbing the cake’s form.
An offset spatula aids in smoothing frosting after cutting, maintaining a polished appearance. Consider a cake serving chart for visual guidance, and a ruler can assist with marking precise grid lines for even portions, especially for larger gatherings.
Understanding Cake Serving Sizes
Determining appropriate portions is key; a 9-inch round cake typically yields 12-16 servings, depending on desired slice size and the chart used.
Standard Serving Sizes for a 9-Inch Cake
Generally, a 9-inch round cake is most commonly cut into 12 equal servings, providing a generous slice for each guest. However, for larger parties or smaller appetites, increasing the slice count to 16 is perfectly acceptable.
Consider the occasion and the other desserts available when deciding on portion sizes. A detailed cake serving size chart can visually demonstrate these differences, aiding in precise cutting and ensuring equitable distribution amongst attendees.
Wilton’s guide suggests moving in two inches from the edge for accurate tier cutting, influencing the final serving yield.
Using a Cake Serving Chart
A cake serving chart is an invaluable tool for visualizing how to cut a 9-inch round cake to achieve desired portion sizes. Charts often display circular diagrams illustrating cuts for 8, 12, or 16 servings.
These visual aids help determine the angle and spacing of each slice, ensuring uniformity. Referencing a chart, like Wilton’s Party Cake Cutting Guide, simplifies the process, especially for tiered cakes or complex designs.
Proper utilization guarantees everyone receives an equally enjoyable piece!
Methods for Cutting a 9-Inch Round Cake
Two primary methods exist: the traditional wedge approach, ideal for classic presentation, and the grid method, perfect for creating uniform, square portions.
Each technique offers distinct advantages depending on the occasion and desired aesthetic.
The Traditional Wedge Method
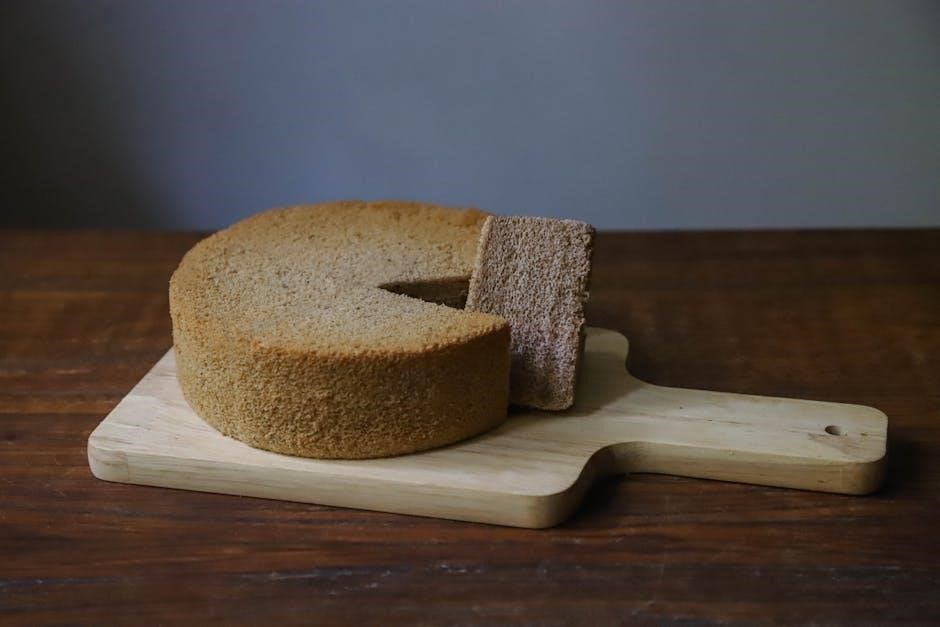
The wedge method is a time-honored approach to cutting cakes, resulting in elegant, fan-shaped slices. Begin by making a single cut from the center of the cake to the outer edge, establishing the initial wedge.
Subsequent cuts follow this pattern, radiating from the center, creating evenly sized portions. This method is visually appealing and suits various cake styles, offering a classic presentation for any event. It’s a straightforward technique, easily mastered with a little practice.
The Grid Method (for Even Squares)
The grid method excels at producing uniformly sized square or rectangular cake portions, ideal for precise serving counts. This involves mentally or lightly marking a grid pattern on the cake’s surface before cutting.
Cutting along these marked lines creates neat, even squares, minimizing waste and ensuring fair distribution. It’s particularly useful for sheet cakes but adaptable to round cakes with careful planning, offering a modern and organized presentation.
Step-by-Step Cutting Guide: Wedge Method
The wedge method, a classic approach, begins with a central cut and radiates outwards, creating triangular slices for easy serving and enjoyment.
Follow these steps for consistently sized wedges, ensuring a delightful experience for all your guests.
Preparing the Cake for Cutting
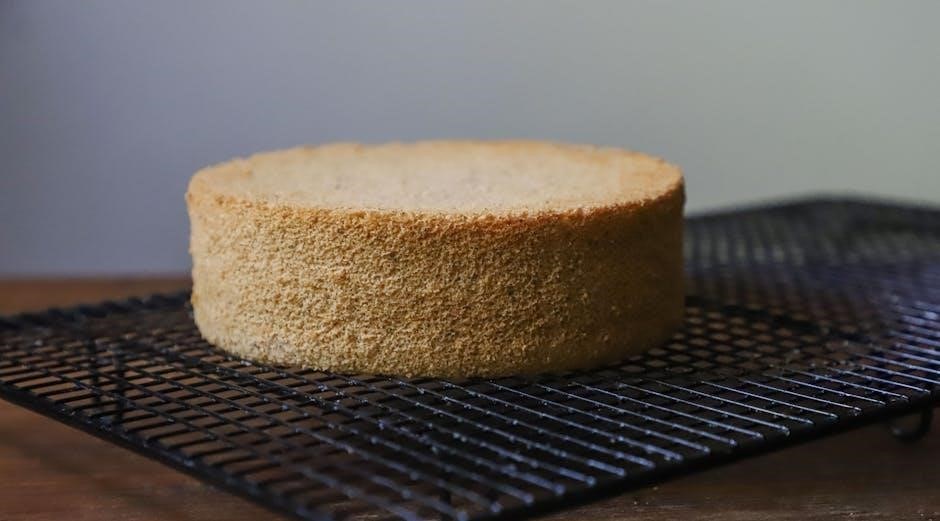
Before you begin, ensure your 9-inch round cake is completely cooled; this prevents smudging frosting and ensures clean cuts. Gently poke holes in the cake with a wooden spoon handle if you plan to soak it with a liquid, like espresso, allowing even absorption;
If the cake has delicate decorations, assess their placement and plan your cuts accordingly to minimize disturbance. A stable surface is crucial for controlled slicing, so choose a firm, level countertop or cake stand.
Making the First Cut
Begin by locating the center of the 9-inch round cake; visualize or lightly mark it. Using a long, sharp knife – preferably warmed – start cutting from the edge, pressing down gently and moving towards the center in a straight line.
This initial cut establishes the foundation for even wedges. Maintain a consistent angle and pressure throughout the cut to ensure a clean, smooth line. Don’t saw back and forth; a single, decisive motion is best.
Subsequent Cuts for Even Wedges
Following the first cut, rotate the cake slightly and repeat the process, creating another wedge. Continue this rotation and cutting pattern, aiming for equal angles between each slice. Visualize dividing the cake into the desired number of servings – a chart can help!
Maintain consistent wedge sizes by carefully estimating the angle with each cut. A warm knife and a steady hand are crucial for achieving professional-looking, uniform slices.
Step-by-Step Cutting Guide: Grid Method
For perfectly even squares, the grid method involves marking lines across the cake’s surface, then carefully cutting along those lines for uniform portions.
Marking the Grid on the Cake
Begin by visualizing the desired size of each square slice; consider the number of servings needed for your event. Using a ruler or the back of a knife, gently score lines across the cake’s top, creating a grid pattern.
Move in two inches from the edge, as indicated in Wilton’s Party Cake Cutting Guide, to ensure even portions. Lightly press to avoid cutting completely through the frosting, maintaining a clean presentation.
Consistent spacing is key for uniform slices, so take your time and double-check measurements before proceeding to the cutting stage.
Cutting Along the Marked Lines
Carefully use a long, sharp knife to follow the scored grid lines, applying gentle pressure and sawing motions rather than forcing the blade through the cake.
Maintain a consistent angle to ensure each slice has a uniform height and appearance. Wipe the knife clean after each cut to prevent frosting buildup and ensure clean edges.
Prioritize slow, deliberate movements for precise cuts and a professional finish, resulting in perfectly portioned squares.
Ensuring Clean Cuts
To achieve pristine slices, a warm knife is essential; dip it in hot water and wipe dry between each cut to minimize crumbling and sticking.
Avoid dragging the knife across the frosting – instead, lift and press down for a clean separation. Rotating the cake, rather than the knife, provides greater control and precision.
Gentle pressure and a steady hand are key to preventing a messy presentation and maintaining the cake’s aesthetic appeal.

Tips for Clean and Professional Cuts
Employing a warm knife, rotating the cake instead of the knife, and wiping the blade between slices are crucial for polished, professional-looking results.
Using a Warm Knife
A warm knife is essential for achieving clean cuts through frosting and cake layers, preventing tearing and crumbling. Run your knife under hot water, then thoroughly dry it before each cut, or dip it in warm water and wipe it clean.
The heat gently melts the frosting, allowing the knife to glide smoothly. Repeat this process as needed during cutting, especially for cakes with thick or firm frosting, ensuring consistently neat slices.
Rotating the Cake, Not the Knife
For consistently even slices, rotate the cake on its stand while holding the knife stationary. This technique provides greater control and prevents dragging the knife, which can distort the cake’s shape and frosting.
Maintain a steady hand and gently turn the cake with your non-dominant hand, guiding the knife through each slice. This method is particularly useful for intricate designs or delicate frosting work, preserving the cake’s aesthetic appeal.
Wiping the Knife Between Cuts
To achieve clean, professional-looking slices, wipe the knife blade after each cut. This simple step prevents frosting from building up and smudging across subsequent slices, ensuring a neat presentation.
Use a clean, damp cloth or paper towel to gently wipe the blade. Maintaining a clean knife is crucial for preserving the cake’s appearance and preventing a messy, uneven finish, especially with delicate frostings.

Dealing with Frosting and Decorations
Protecting delicate decorations during cutting is key; carefully plan your slices. Re-applying frosting to cut edges can restore a polished look quickly.
Protecting Decorations During Cutting
When a cake boasts intricate decorations, preserving their beauty requires a thoughtful approach to cutting. Visualize your slices before you begin, aiming to avoid direct contact with delicate elements like sugar flowers or piped details. Consider starting cuts from areas with minimal decoration, gradually working towards the more embellished sections.
A gentle, steady hand is crucial; avoid sawing motions that could disrupt the frosting or decorations. If possible, use a long, thin knife to minimize disturbance. Remember, careful planning and execution are your allies in maintaining a visually stunning presentation!
Re-applying Frosting to Cut Edges (if needed)
Sometimes, despite careful cutting, exposed cake edges can detract from the overall presentation. Don’t worry! A small offset spatula and a bit of reserved frosting can easily remedy this. Gently apply a thin layer of frosting along the newly cut sides, blending it seamlessly with the existing frosting.
This quick touch-up creates a polished look, concealing any imperfections and maintaining the cake’s aesthetic appeal. Ensure the frosting matches the original flavor and consistency for a flawless finish.
Cutting Cakes with Layers
Layered cakes require a delicate approach; cutting through multiple layers simultaneously is key for clean slices and maintaining structural integrity.
Stabilizing the cake beforehand prevents shifting and ensures even portions.
Cutting Through Multiple Layers Simultaneously
Achieving clean cuts through layered cakes demands a smooth, downward pressure with a long, sharp knife. Avoid sawing motions, as these can disrupt the layers and cause crumbling.
Begin with a centered cut, then continue slicing in a single, fluid motion.
Consider gently warming the knife for easier penetration, especially with firmer fillings.
Rotating the cake rather than the knife provides greater control and consistency in slice size, resulting in a professional presentation.
Stabilizing Layer Cakes Before Cutting
Prior to cutting, ensure your layered cake is adequately stabilized to prevent shifting or collapsing. Chilling the cake for at least 30 minutes, or even longer, firms up the frosting and layers.
Using dowels or straws inserted into the cake’s interior provides structural support, particularly for taller cakes.
A crumb coat, chilled before final frosting, also contributes to stability;
Proper stabilization guarantees neat slices and a visually appealing presentation, enhancing the overall enjoyment.
Cake Cutting for Different Occasions
Adjust your cutting method based on the event; smaller gatherings benefit from larger wedges, while large parties require more, smaller, uniform slices.
Consider the chart for appropriate cake serving sizes.
Cutting for Small Gatherings
When hosting intimate gatherings, prioritize generous slice sizes for a more indulgent experience. Employ the traditional wedge method, aiming for 6-8 substantial portions from a 9-inch round cake.
Focus on creating visually appealing, larger wedges rather than striving for precise uniformity. A relaxed approach suits smaller groups perfectly, allowing for a more casual and enjoyable dessert presentation. Refer to a cake serving size chart as a guide, but feel free to adjust based on your guests’ appetites.
Cutting for Large Parties
For larger parties, maximizing slices is key; the grid method proves most efficient. Aim for 12-16 even squares from a 9-inch round cake, ensuring each guest receives a portion. Precise cuts, guided by marked lines, are crucial for equitable distribution.
Consult a cake serving size chart to estimate accurately. Prioritize clean cuts to maintain presentation, even with a high volume of servings. Consider pre-cutting slices to streamline service and minimize crowding around the cake.

Troubleshooting Common Cutting Problems
If the cake crumbles, a warmer knife helps! Uneven slices often result from inconsistent pressure or not rotating the cake properly during cutting.
Cake Crumbling During Cutting
Dealing with a crumbly cake during cutting is a common frustration, but easily addressed! A primary cause is a too-cool or dry cake; ensure it’s at room temperature.
More importantly, utilize a warm, clean knife – gently warming the blade in hot water and wiping it dry between each cut significantly reduces crumbling.
Avoid sawing motions; instead, apply gentle, downward pressure and maintain a smooth, consistent cutting action for cleaner slices and a more presentable cake.
Uneven Slice Sizes
Achieving uniform slices requires a methodical approach. The traditional wedge method often leads to varying sizes, especially with freehand cutting.
Consider switching to the grid method, marking precise lines before cutting, ensuring each piece is consistently sized.
Alternatively, visualize the cake divided into equal sections and rotate the cake, not the knife, maintaining consistent angle and pressure with each cut for more even results.

Resources for Further Guidance
Explore Wilton’s Party Cake Cutting Guide for detailed diagrams and techniques. Online cake serving size calculators also assist in portioning for various events.
Wilton’s Party Cake Cutting Guide
Wilton provides a comprehensive resource for achieving professional-looking cake slices, particularly useful for a 9-inch round cake. Their guide details cutting strategies for round tiers, recommending a two-inch inward movement for optimal portioning.
The chart within the guide visually demonstrates how to maximize slices while maintaining consistent sizes. It’s an invaluable tool for party planning, ensuring sufficient servings for all guests, and minimizing waste. Accessing this guide simplifies the process!
Online Cake Serving Size Calculators
Numerous online calculators simplify determining appropriate slice sizes for a 9-inch round cake, eliminating guesswork. These tools factor in cake density and desired portion sizes, offering tailored recommendations.
Inputting the cake’s diameter and number of layers yields a precise estimate of potential servings. Utilizing a cake serving size chart alongside these calculators ensures accurate planning for any event, from intimate gatherings to larger celebrations, guaranteeing enough for everyone!

Storing Leftover Cake
Proper storage, tightly wrapped, maintains cake freshness for days. Refrigeration extends shelf life, but room temperature is ideal for texture preservation.
Proper Storage Techniques
To preserve the quality of your leftover 9-inch round cake, airtight storage is paramount. Wrap cut edges with plastic wrap to prevent drying, then place the cake in an airtight container.
For short-term storage (up to two days), room temperature is suitable, away from direct sunlight. However, if storing for longer periods, refrigeration is recommended. This slows down spoilage, but may slightly alter the cake’s texture.
Consider freezing individual slices for extended enjoyment; wrap tightly in plastic wrap, then foil.
Maintaining Freshness
Ensuring your 9-inch round cake remains delightfully fresh hinges on minimizing air exposure. After proper storage, monitor for any signs of drying or staleness. A slightly stale cake can sometimes be revived with a brief warming in the oven.
Refrigerated cake benefits from being brought to room temperature before serving, enhancing its flavor and texture. Avoid storing near strong-smelling foods, as cake readily absorbs odors.
Properly stored, a cake can retain its quality for several days.
Advanced Cutting Techniques
Explore decorative cuts using templates for unique presentations, elevating your 9-inch cake beyond standard slices. Precision and creativity enhance the visual appeal!
Creating Decorative Cuts
Beyond simple wedges, decorative cuts transform a 9-inch cake into a stunning centerpiece. Utilize geometric patterns, floral designs, or even personalized shapes with carefully crafted templates.
Employ a sharp, thin-bladed knife for intricate detailing, ensuring clean lines and minimizing crumbs. Consider using contrasting frosting colors to accentuate the cut designs, adding visual interest.
Practice on parchment paper first to refine your technique before applying it to the actual cake, guaranteeing a polished and professional finish for any occasion.
Using Cake Cutting Templates
Cake cutting templates elevate presentation, enabling precise and artistic slices. These range from simple geometric shapes to elaborate designs, simplifying complex cuts.
Place the template gently on the frosted cake and use a sharp knife to trace the pattern, applying even pressure for clean lines. Templates are especially useful for achieving uniform portions or creating themed cuts.
Reusable plastic or sturdy paper templates offer convenience and consistency, ensuring a professional look every time, regardless of your cutting skill level.